

How To Cut A Circle In Half
Information technology'due south easy to create a circumvolve in Photoshop using the Ellipse Tool, merely it isn't quite equally easy to create a half circle. Luckily there is more than one technique, and neither of them is hard. You can create a half circle in just one or two extra steps after creating a circle.
In one case yous've made your one-half circle, it's easy to turn it into a custom shape. This will save you time and effort whenever you need to add a half circumvolve to your work in the future. Let's jump in and begin.
How To Brand A Half Circle In Photoshop
There are two easy options for creating a half circle in Photoshop. 1 is destructive, and the other is non-destructive using masks. I'll encompass both options, so you can observe what works all-time for you.
Option i: Create A Half Circle Path
This method is an intuitive way of creating a half circumvolve. The downside of this option is that it is a destructive method and cannot exist rectified back to a full circle after on. The advantage, however, is that it can be saved as a custom shape, which I'll touch on later on.
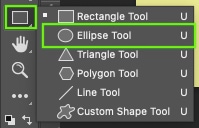
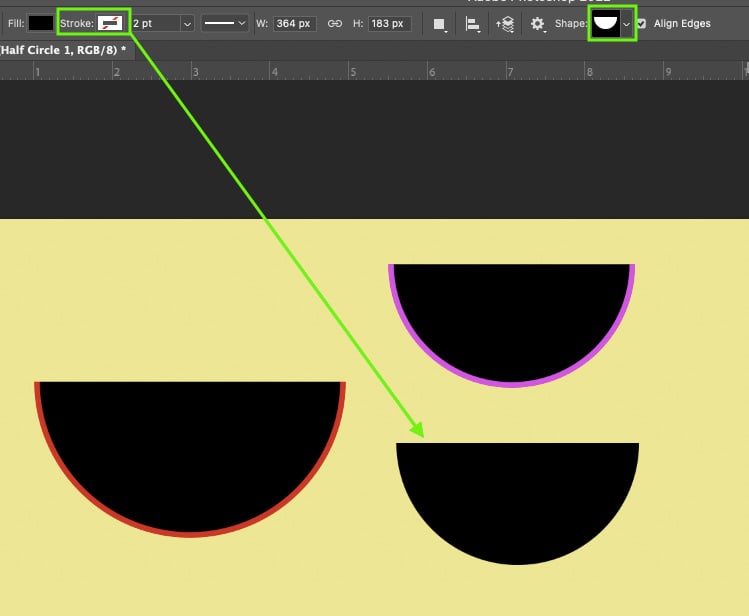
Pace one: Select The Ellipse Tool
The Ellipse Tool may be hidden nether the Shape Tools in your toolbar. Find the Shape Tool (U) and click and hold to bring out the other Shape Tool options. Select the Ellipse Tool.

Stride 2: Draw An Ellipse
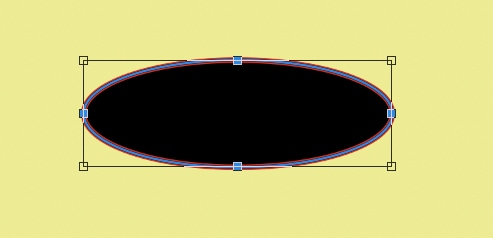
Using the Ellipse Tool (U), click and drag on your canvas to create a circumvolve.
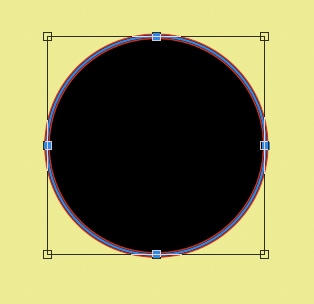
To brand an equal circle, concur Shift while dragging, and as your circumvolve grows, it volition stay perfectly equal and circular.
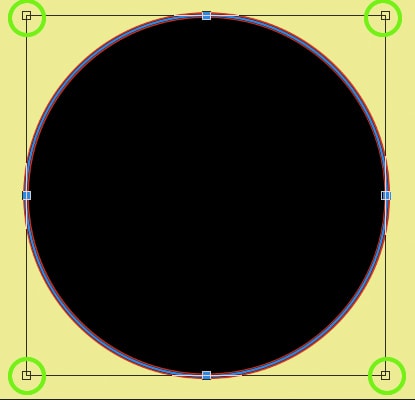
To resize your circumvolve after you've created information technology, click and elevate any of the anchor points on the transform box.
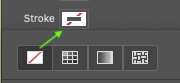
Footstep iii: Adapt The Stroke & Make full Settings
After cartoon with the Ellipse Tool, the Properties panel will appear.
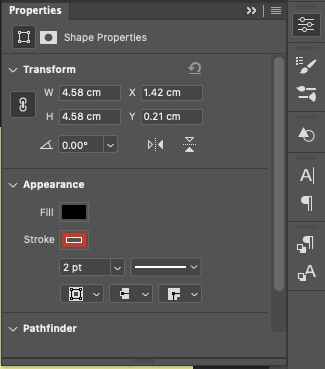
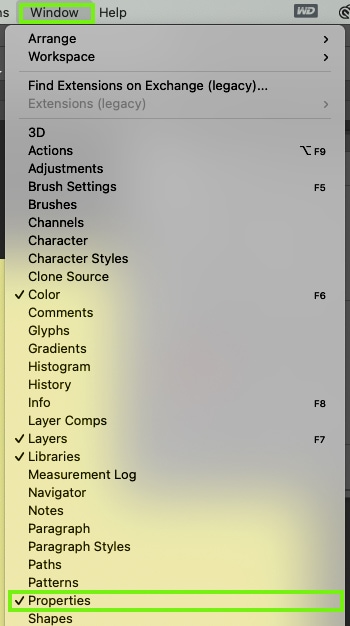
If it doesn't automatically announced, you can notice the Backdrop console by going to Window > Backdrop.
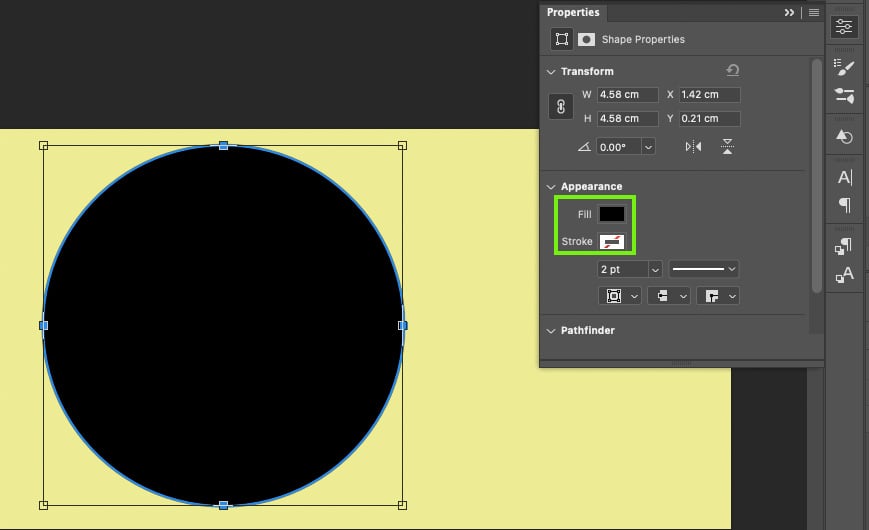
In the Properties panel, you tin change the color of your circumvolve under Appearance.
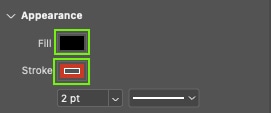
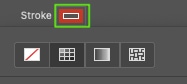
To change either color, click the colour swatch. Set up the Stroke to none and choose a color for the circle's Fill.
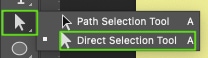
Step iv: Select The Directly Choice Tool
The Direct Option Tool (A) allows you to select individual ballast points in order to edit them directly.
You tin can detect the Direct Selection Tool in the toolbar.
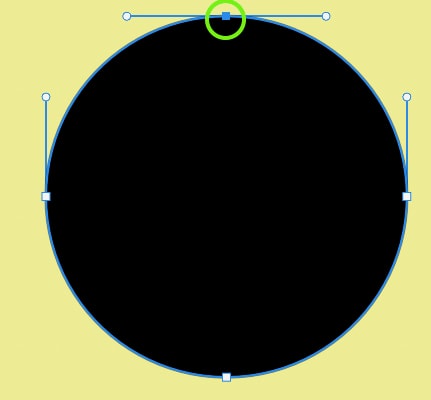
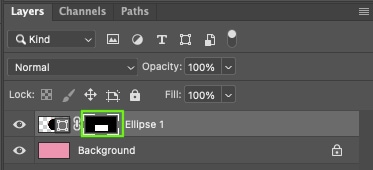
Pace five: Select And Delete One Anchor Point
Using the Direct Selection Tool, select anywhere on your ellipse shape to make the circle's anchor points appear.
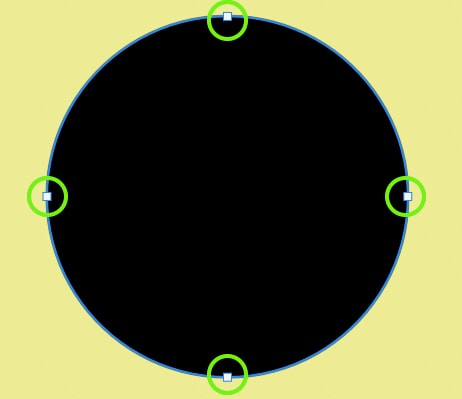
The ballast point y'all select will go the flat edge of your half circle, so determine which one-half of the circle you want to remove. Click an ballast point to select it and deselect the other three.
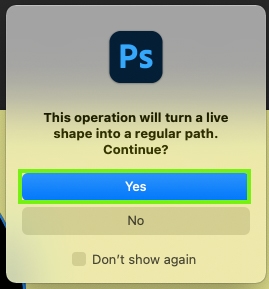
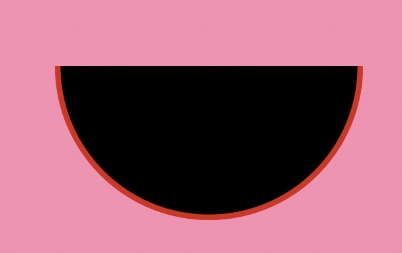
Footstep six: Press Delete On One Anchor Signal
To create the half circle, press Delete on your selected anchor point.
Once you press Delete, a popup will appear. Select Aye to confirm changing from a alive shape to a regular path.
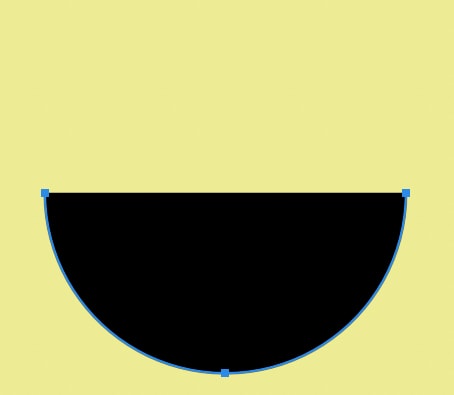
Your selected ballast point volition exist removed, every bit well equally the one-half of the circle it is attached to. This leaves backside a half circumvolve.
Option 2: Creating A Half Circle With Masks
Layer masks are used to hide an area from view, giving the appearance of a one-half circumvolve when really the other half is merely "hidden" away. This works well for i-off uses merely cannot be used to create a custom shape afterwards.
Step i: Select The Ellipse Tool
Find the Shape Tool (U) and click and agree to bring out the other Shape Tool options. Select Ellipse Tool from the pop-up bill of fare.
Footstep ii: Draw An Ellipse
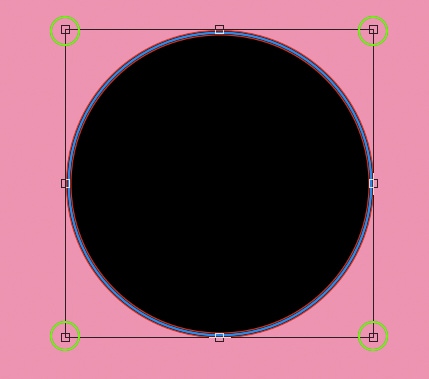
Using the Ellipse Tool, click and drag out on your canvas once again to create a circumvolve. To create a perfect circle, hold Shift while dragging out.
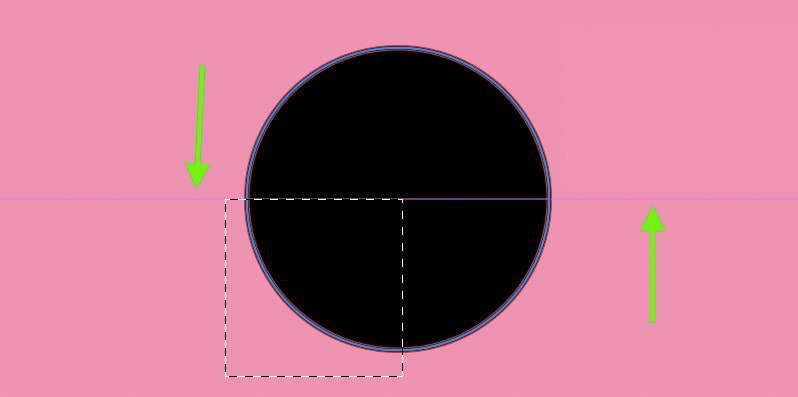
Pace iii: Draw A Rectangular Marquee Selection
To create the one-half circle, you lot're going to draw a rectangular marquee option over i-half of the circle.
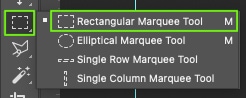
First, select the Rectangular Marquee Tool (M).
Draw a rectangular selection over half of your circle. Wherever you place your option volition become the half circle.
If you centre your circle in the middle of the canvas, guidelines will appear when your marquee is lined up with the circle's center. This ensures you'll result in a true half circumvolve.
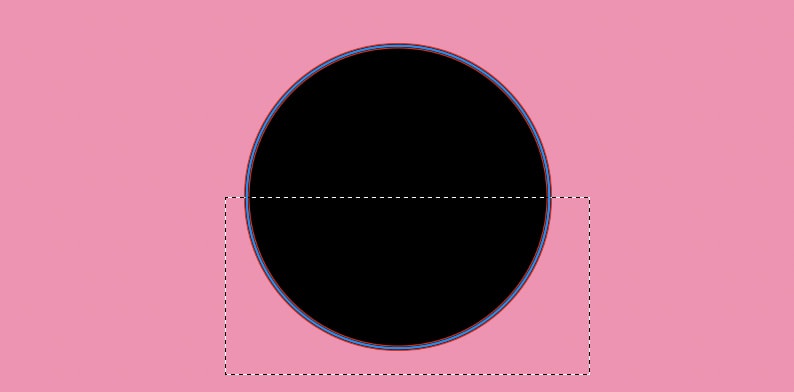
Step 4: Add A Layer Mask
Now to create the non-destructive half circle, you need to add a layer mask.
With your shape layer selected in the Layers Panel, click the layer mask icon to utilise the marquee selection to a mask.

This immediately adds a mask to your image, ensuring only half of your circle remains visible. Now yous have a visible half circle.
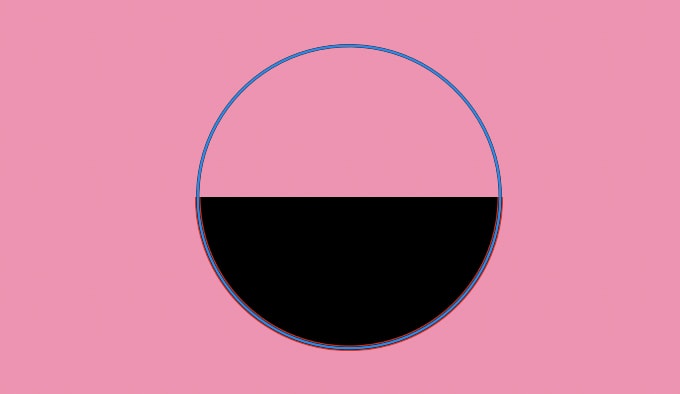
Anything white on the layer mask is visible, and annihilation black is hidden.
Deselect your circle by clicking elsewhere on the canvas to see the concluding half circumvolve result.
How To Salve Your Half Circle As A Custom Shape
If you created your half circumvolve using paths rather than a mask, you can plow it into a custom shape to use with the Custom Shape Tool.
Creating a custom shape saves time if you demand to create a one-half circle once more since the Custom Shape Tool saves shapes similar a postage stamp that you tin utilize whenever you want.
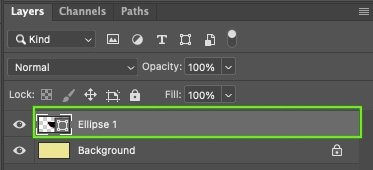
Step 1: Select Your Half Circle Path
Afterward you take followed the path method outlined in Option i, make sure your shape layer is selected within the Layers panel.
Step 2: Edit > Define Custom Shape
Now you can turn your half circle into a custom shape past going to Edit > Define Custom Shape.
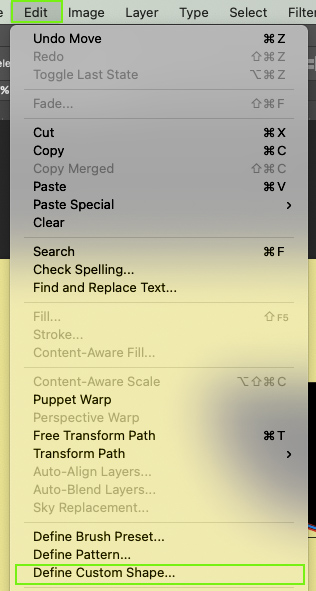
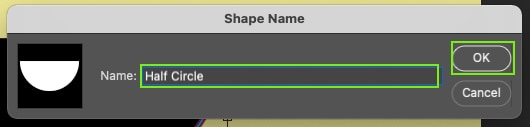
Name your new shape in the dialog box that appears. Click OK in one case y'all've named it.
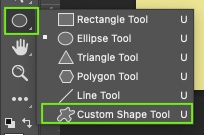
Step 3: Access Custom Shape From Custom Shape Tool
To discover your newly created one-half circle custom shape, open the Custom Shape Tool found inside the Shape Tool menu.
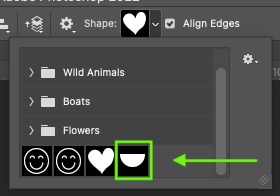
One time active, there will exist a custom shape setting institute in the Options bar. Here, you'll observe any previously created or used Custom Shapes. Click the arrow past the shape icon to open the dropdown card.

Your new half-circle shape volition exist found at the bottom of the list.
Step 4: Describe Your Half Circle Custom Shape
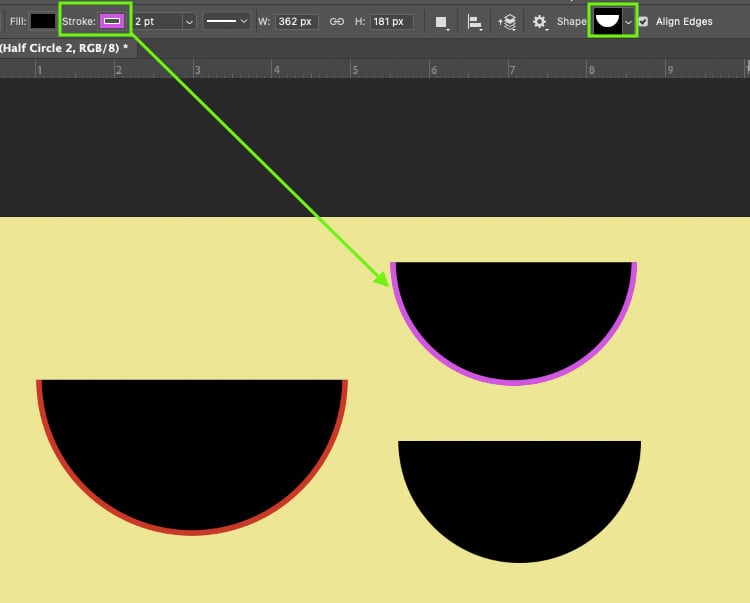
Just every bit with any shape, just click and drag on your sail to depict your half circle. To keep proportions restrained, hold downward Shift while dragging.

The one-half circumvolve will be created, and you lot can edit the stroke and fill settings every bit needed in the Options bar or the Properties panel.
Now to further your skills with the shape tool, be sure to read my ultimate guide to working with shapes in Photoshop here.
Source: https://www.bwillcreative.com/how-to-make-a-half-circle-in-photoshop/
0 Response to "How To Cut A Circle In Half"
Post a Comment